
When it comes to professional apparel branding, left chest digitizing plays a crucial role in achieving clean, balanced, and high-quality embroidery results. The left chest area is one of the most popular placements for logos on polo shirts, uniforms, jackets, and corporate wear. However, achieving the perfect look requires careful attention to design size, stitch count, and fabric compatibility. Choosing the ideal dimensions and optimizing stitch density ensures that logos remain sharp, readable, and durable without overwhelming the garment.
Why Left Chest Embroidery Placement Matters
Left chest embroidery is widely used in corporate branding, hospitality uniforms, healthcare apparel, and promotional clothing. This placement offers subtle visibility while maintaining a professional appearance.
Standard Placement Guidelines
The typical left chest logo is positioned:
-
3.5 to 4 inches from the garment’s center
-
7 to 9 inches down from the shoulder seam
-
Centered between the placket and sleeve seam
Proper alignment ensures consistency across multiple garments and bulk orders.
Importance of Balanced Proportion
A logo that is too large can look overwhelming, while a logo that is too small may appear unnoticeable. Maintaining proportional balance enhances brand recognition and visual appeal.
Ideal Size for Left Chest Embroidery
Selecting the correct size is essential for clarity and comfort.
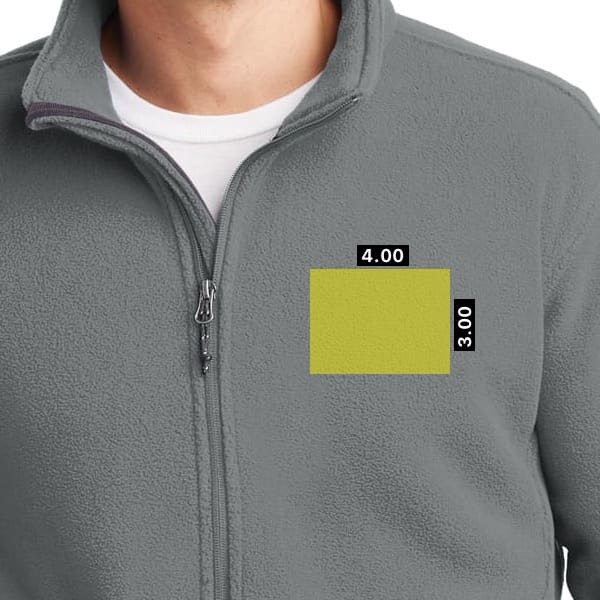
Standard Logo Dimensions
The most common size for left chest embroidery is:
-
Width: 3 to 4 inches
-
Height: 2 to 2.5 inches
These dimensions work well for most adult garments. For youth sizes or smaller apparel, slight adjustments may be required.
Factors That Influence Size Selection
Several elements determine the ideal size:
-
Complexity of the logo
-
Amount of text included
-
Garment type (polo, jacket, dress shirt)
-
Target audience (adult or youth sizing)
Highly detailed logos may need slight enlargement to maintain readability.
Understanding Stitch Count in Left Chest Embroidery
Stitch count refers to the total number of stitches used to create a design. It directly impacts embroidery quality, production time, and cost.
Average Stitch Count Range
For standard left chest logos, stitch counts typically range from:
-
5,000 to 12,000 stitches
Simple logos with minimal fill may stay under 6,000 stitches, while more detailed designs with multiple colors and text can reach 10,000–12,000 stitches.
How Stitch Count Affects Quality
An appropriate stitch count ensures:
-
Smooth thread coverage
-
Clean outlines
-
Long-lasting durability
-
Minimal puckering
Excessively high stitch counts can make the design stiff and uncomfortable, especially on lightweight fabrics.
Balancing Detail and Simplicity
One of the biggest challenges in left chest embroidery is preserving fine details in a relatively small space.
Simplifying Complex Logos
If a logo includes intricate artwork or small text, consider:
-
Increasing letter spacing
-
Removing unnecessary design elements
-
Thickening thin lines
-
Adjusting font size for readability
Simplified artwork improves stitch clarity and reduces thread breaks.
Choosing the Right Font Size
For small embroidery areas, text should generally be at least 0.25 inches tall to maintain legibility. Smaller text may blur or merge during stitching.
Fabric Considerations for Left Chest Embroidery
Different fabrics require different digitizing adjustments.
Polo Shirts and Cotton Blends
Cotton and poly-cotton blends are commonly used for corporate polos. These fabrics require balanced density and proper underlay to prevent puckering.
Performance and Stretch Fabrics
Moisture-wicking and stretch materials demand lighter stitch density and added stabilization. Without proper adjustments, the logo may distort.
Jackets and Outerwear
Heavier fabrics like fleece and softshell jackets may require slightly increased density to ensure smooth thread coverage.
Proper Digitizing Techniques for Left Chest Logos
Professional digitizing is essential for achieving consistent results.
Underlay Stitches for Stability
Underlay stitches act as a foundation, providing support for top stitches. Common underlay types include:
-
Edge-run underlay for outlines
-
Zigzag underlay for fill areas
Proper underlay reduces fabric movement and enhances durability.
Push and Pull Compensation
Fabric naturally shifts during embroidery. Compensation adjustments help maintain accurate design dimensions and prevent distortion.
Stitch Direction Optimization
Carefully planned stitch direction improves visual flow and reduces thread stress, resulting in a cleaner finish.
Managing Production Efficiency and Cost
Stitch count directly affects machine runtime and overall production cost.
Reducing Unnecessary Stitches
Optimizing design layout and eliminating excessive fills can reduce stitch count without sacrificing quality. Efficient digitizing lowers production time and improves profit margins.
Conducting Sample Runs
Always test the design on the actual garment type before full production. Sample runs help identify alignment issues, density problems, or thread tension adjustments.
Common Mistakes to Avoid
Avoiding common errors ensures professional results.
Oversized Logos
Logos larger than 4 inches wide may look disproportionate and unprofessional on left chest placement.
Overly Dense Stitching
Too much density can cause stiffness, puckering, and thread breakage.
Ignoring Garment Variations
Different shirt sizes and styles may require minor placement adjustments to maintain consistent branding.
Best Practices for Long-Lasting Left Chest Embroidery
Durability is just as important as appearance.
-
Use high-quality polyester embroidery thread
-
Select the correct needle type
-
Ensure proper hooping and stabilization
-
Maintain consistent machine tension
These practices ensure logos remain sharp and intact even after repeated washing and daily wear.
Final Thoughts on Ideal Size and Stitch Count
Determining the ideal size and stitch count for left chest embroidery requires careful planning, professional digitizing, and attention to fabric type. Standard dimensions of 3 to 4 inches wide with stitch counts between 5,000 and 12,000 stitches provide a reliable starting point for most designs. However, adjustments may be necessary depending on logo complexity and garment material.
For businesses seeking consistent, high-quality results, partnering with experienced professionals ensures precision and efficiency. Working with trusted experts like USA Digitizing Pro guarantees optimized stitch files, balanced density, and flawless embroidery that enhances brand image and durability across every garment.


